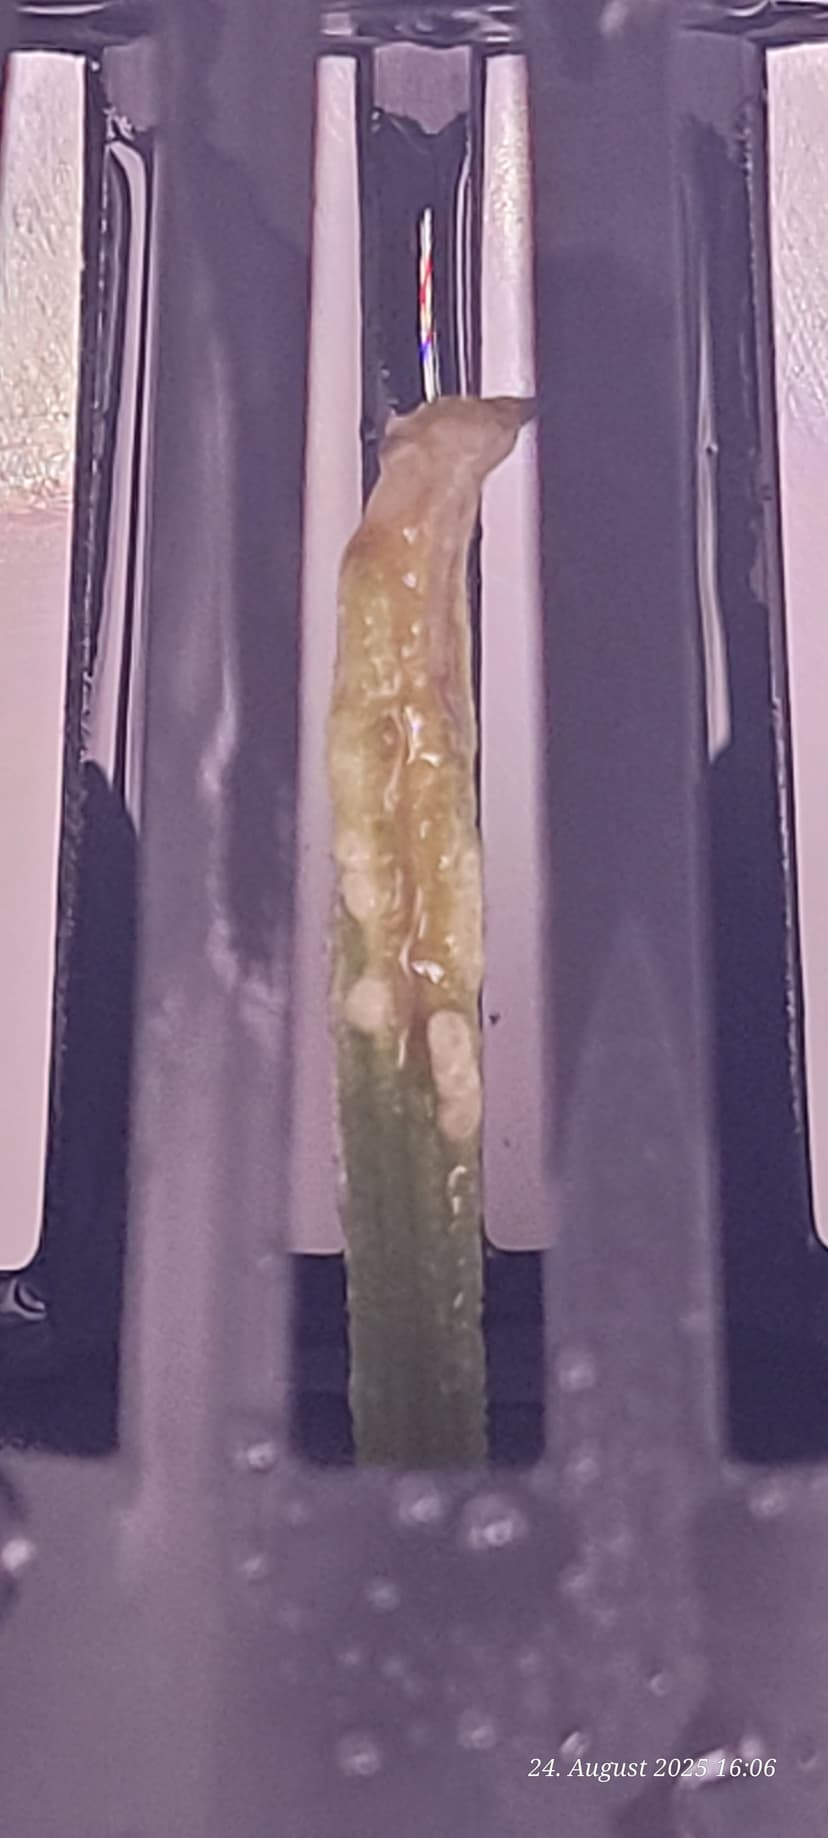
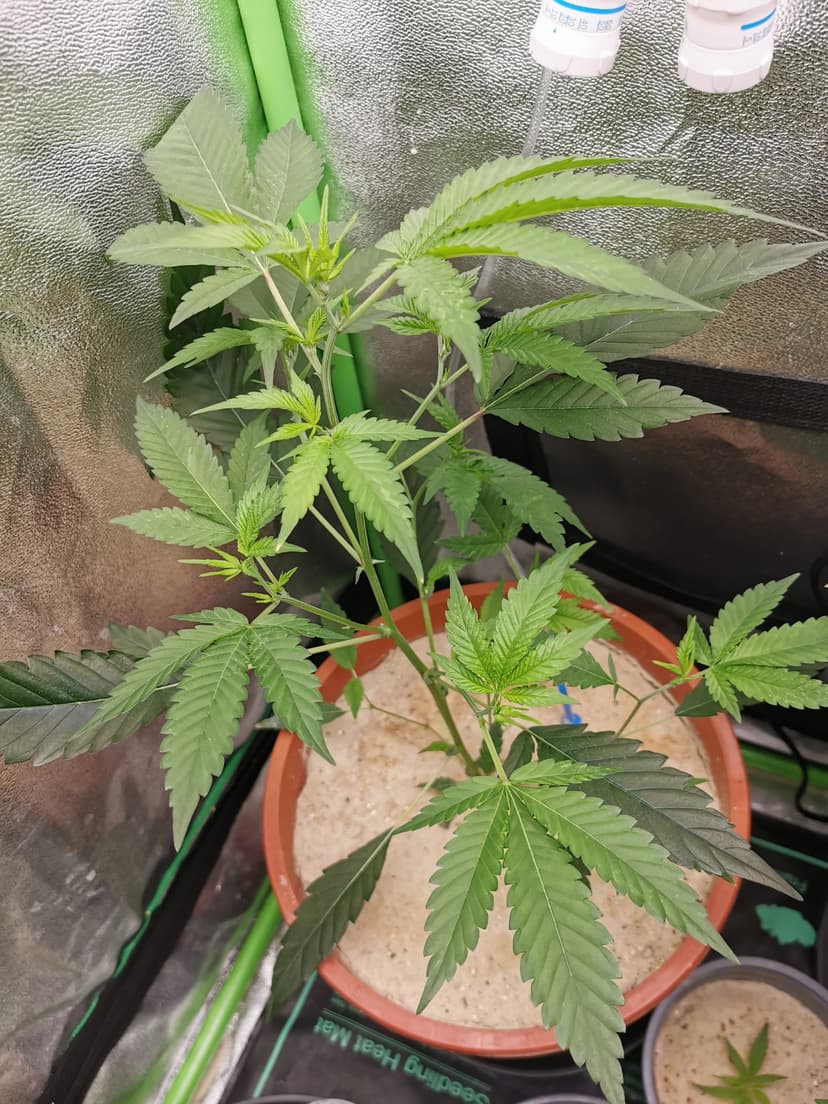
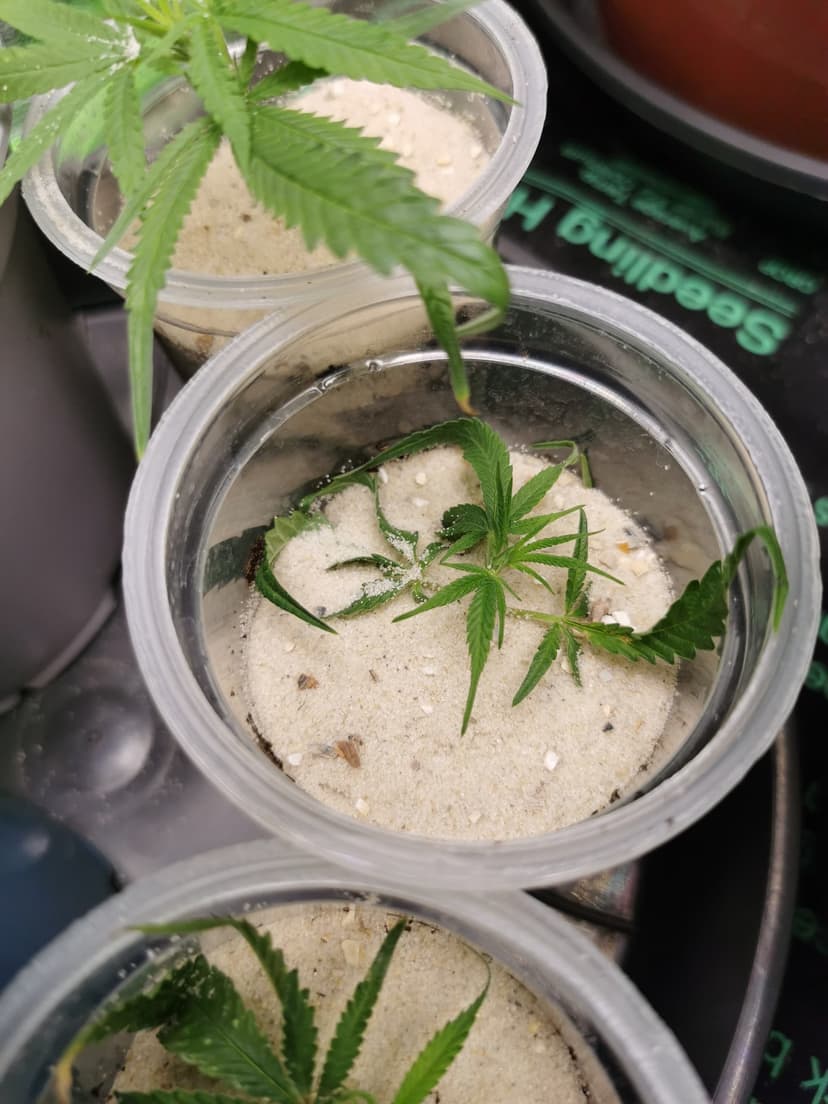
I used to do it that way before, cut diagonally. But after I saw a video comparing two cuttings, one cut diagonally and one directly below the node, leaving the nodeās bump intact, and the one with the node rooted much better, I now leave the node intact. And lo and behold, the 5 cuttings with the node as the lower end rooted well; one where it didnāt work at the node because it was too small, didnāt root.
Stecklinge in der Blütenphase š§āš¬
48 respuestas Ā· 520 visitas
Well, you see, my @snAke, ![]()
![]()
It works better for you that way. Thatās super cool! Iāll definitely remember that! And Iāll try it right away with the next batch! ![]()
![]()
Iām curious anyway how long it will take this time. And which of my āACā will become something. ![]()
![]()
Wonderful, thatās how I imagined it here! ![]()
Advice is always welcome! ![]()
![]()
Grow on ![]()
![]()
![]()
![]()
![]()
![]()
![]()
![]()
My last cutting, which I couldnāt cut below the node because it was too short, has now rooted. I need to slowly assemble my propagation box (a wire shelf, emergency blanket around cardboard, 2x 20w grow lights) so I can get a bit more space and light. Iāll use 5-liter pots and let them veg in there until the tent is free again (approx. 33 days). Depending on how big they are then, another one or two weeks of veg and then into flower. A quick run with 3 Blue Zushi and 3 Jealousy clones.
Hello everyone, and Paule is also running a cutting project with a small interim report.

Water temperature 24.9 degrees Celsius, also quite constant due to a 25 Watt aquarium heater lying in 5 liters of water.


The grow chamber has been in operation since 08/19/25, fully air-conditioned.
Up top, the young plants are standing strong. No sickly appearance!
Right from the start, roots were visible in 3 days, which seemed a bit exaggerated to me at first.
On day 5 today, something in the direction of rooting can already be discerned on both the right and left.
The ones on the right were already in water for 6 days before they were placed there. The ones on the left for 3 days. But now theyāve been in there for 5 days, and both the right and left are developed to about the same extent.
Now a look into the dark, under the floor where the stems are constantly sprayed with well-tempered water and root stimulants.


Somethingās happening, and thatās why the ventilation was opened a bit today to slightly lower the humidity inside. Iām curious to see what happens next time when the cuttings are put directly in there, without being left in water for longer beforehand.
Stay High and have a nice day.
Plant Paule
There he is, @Pflanzenpaul ![]()
I was already waiting for your post here.
Youāre topping us all again here with your āfull-pro toolā. ![]()
![]()
![]()
Thatās a really cool device you have! ![]()
![]()
It also looks very promising! ![]()
If I had the money, Iād get something like that too. Well, luckily itās been working perfectly for me so far. Iām just going to assume that youāll keep us updated here. Just like you always do.
Grow on my Friend ![]()
![]()
![]()
![]()
![]()
![]()
![]()
![]()
So, and once again āBack to the rootsā ![]()
![]()
This time we continue with āZamiā. ![]()

As you can clearly see, after a week in the soil, itās fully revegging. So far, still in the small 0.5 l pot. ![]()
Just for comparisonā¦

That was Zami just a week ago. ![]()
I always find it cool when another cutting makes it. No matter how often I do or have done it. ![]()
![]()
![]()
If Zami continues like this, I will move her to the final pot at the end of the week.
Since the rest is still all in the rooting phase, Iāll leave it at that for now. ![]()
![]()
Until then, stay tuned and see you in the next episode.
Your Dr. Weedenstein
Grow on everyone ![]()
![]()
![]()
![]()
![]()
![]()
![]()
![]()
Hallo my Growlings ![]()
,
Some time has passed again. ![]()
![]()
And as I mentioned at the beginning, it always takes some patienceā¦![]()
![]()
But it always progresses.
For example, here:


![]()
![]()
Yes, those are 2 of the 3 classic cuttings taken from the Strawberry Cough. ![]()
Since the first roots have already reached the outside of the cup. Rooting started days ago. ![]()
![]()
ā¦
And what else happened.. ![]()
Oh, look ![]()

āZamiā is still revegging. ![]()
Now itās in its final pot. ![]()
It still looks very bare. But itās slowly transitioning into normal growth.
What happens next will be really interesting again. ![]()
If you look at how, for example, the lower part of the cutting from which Zami originated now looks.

And even here, thereās still something going on until flowering. Iāve thinned it out twice already. Thereās hardly anything left to see. ![]()
Thatās it from me this time.
Stay curious and see you in the next episode. ![]()
Your Dr.Weedenstein ![]()
Grow on everyone ![]()
![]()
![]()
![]()
![]()
![]()
![]()
![]()
Meanwhile, time to report on my clones. The first one has been in soil since 30.8. and is growing again and looks healthier. I need to take an updated picture tomorrow. Itās probably a Mexican clone.


A Fast Diesel clone then followed on 3.9. into soil.


Another one of the strain is still in the propagator and could also be well-rooted in soil. But;
so I took three lower branches from the Jamaican, but already during flowering time on 29.8. in the 2nd week of flowering.
They were only shortened and then placed directly into the propagator. No angled cut, no Clonex. Only Root Complex from Hesi. The day before yesterday, a last look inside the water bath already showed small first roots.
Thatās why Iām keeping one pot free.
Good evening everyone. Paule
Hello everyone, and here are a few quick cutting pictures from this beautiful Sunday morning. The one that went into soil on August 30th


shows recovery and growth!
The Fast Diesel clone, in soil since September 3rd
Shows the point of no return on the lower leaves
, while recovery is starting at the tip.


It was already yellow in the young shoot at the top. ![]()
I know, the thread is called āCuttings in Flowering Timeā and things are also going well there!
Even better than the ones shown here, because they had already been in water for 3 and 6 days after being cut before they even went into the propagator.
So they took about 18 days until they were in soil.
As for the Jamaican cuttings taken on August 29th and put directly into the propagator, this is how they look today;


All three have already rooted! But Iām letting the roots get a bit bigger before they go into soil to keep transplant shock minimal.
If you zoom in on the Jamaican cutting pictures, you should still be able to see bud sites at the tip. Happy Sunday from Pflanzenpaule
Today, a thorough watering was also on the agenda for the clones, and I wanted to do it particularly well, so I took 1L of water. 1/3 distilled and 2/3 tap water. Now the clones are in 9L pots with Light Mix! So, thereās enough nutrition for a good 3 weeks. The water mixture showed an EC of 0.4. A bit weak for under LED, so I added 0.2g Epsom salt and 0.6g Calcium Sulfate Dihydrate, which brought the EC to 0.7. With another half liter of water, the EC of 0.6 was safe. The pH was still around 8, which I lowered to 6.3 with a few drops of lemon juice after the Hesi Root Complex (2.6ml) and Power Zyme (1ml) were added. Finally, before the final watering, I added 10ml of Molasses/Whey, and as a precaution against any soil-dwelling pests, I stirred 1g of Neem oil with an emulsifier into the water. With this, the rooting phase for 2 clones ended today, and they are now in growth. Iām already looking forward to planting another Jamaican clone soon, as thereās still a pot ready. Stay High, friends, and multiply your plants.
Pflanzenpaule
Es wird mal wieder Zeit⦠![]()
![]()
⦠To let the āsmokableā shine on. And to tell you something from my āgarden.ā ![]()
![]()
Black tent with green plants!
Done! ![]()
Nah, nah.. ![]()
![]()
What are we looking at today?
Zami has arrived in the grow phase. Today she was topped. Hereās another picture before the scissors. ![]()

Still looks very bare? ![]()
![]()
Yep, still very thin for this phase. My guess is the long rooting time. It seems like she lost some power there. But her journey is only just beginning. Weāll see. ![]()
Zamiās ālower endāā¦

Already has the first pistils. ![]()
And is stretching along. ![]()
![]()
And just as a side note⦠All my clones set from the
Strawberry have rooted. So, 100% again.


The funny thing is that you can see which one rooted first. And which one rooted last. ![]()
![]()
Until next time from me here.
Your Dr. Weedenstein ![]()
Grow on everyone ![]()
![]()
![]()
![]()
![]()
![]()
![]()
![]()
Is that bird sand? ![]()
Very nice, very nice ![]()
Hi @KilliczGe ![]()
,
Yes, exactly bird sand.
Let me put it this wayā¦
2 cm bird sand on top + a double layer of weed fabric at the bottom = no more problems with fungus gnats! ![]()
![]()
![]()
For me personally, the most effective way. Iāve been doing it like this since I donāt know when. And it works. ![]()
Every pot of mine looks like this. I only omit the sand for rooting.
Grow on ![]()
![]()
![]()
![]()
![]()
![]()
![]()
![]()
āAt the bottomā at the bottom of the pot? Or under the sand?
Is it also necessary at the bottom for fabric pots?
Yes, Iāve also experimented around. Lava mulch works with small grit but is expensive in the long run.
Pumice sand stays moist for too long and pumice stone is too light.
Then the budgies will probably have to give up some sand. ![]()
![]()
This topic is awesome and it even works. I also tested it after reading about it here ![]()
![]()
Took a cutting in bloom, put it in a glass and cut it directly at the leaf node, after three days the first roots were visible
A big cheer to your experiments ![]()
Moin moin ![]()
![]()
Since Iāve never used fabric pots before, this is now a bit tricky. ![]()
But, for explanation, the plants go on the bottom of the pot, soil on top, and then the sand.
The sand will definitely keep the surface clear for you. Since I donāt know how coarse the fabric of your pots is. Itās hard to say.
Grow on ![]()
![]()
![]()
![]()
![]()
![]()
![]()
![]()
So many questions ![]()
@KilliczGe with the fabric pot, you didnāt have to put fleece at the bottom. Why? Itās completely closed!
With plastic pots or generally those that have these drainage openings. You put the fleece in there so that fungus gnats donāt get to the soil at the bottom and lay their eggs there. Greetings from Paule
Hello everyone. I wanted to show something earlier, but unfortunately something came up. But today Iām showing the Mexican clone, which has now probably rooted well in the big pot.
Today 28 days old, 16 days in soil and 9 days now in cultivation, it looked like this today
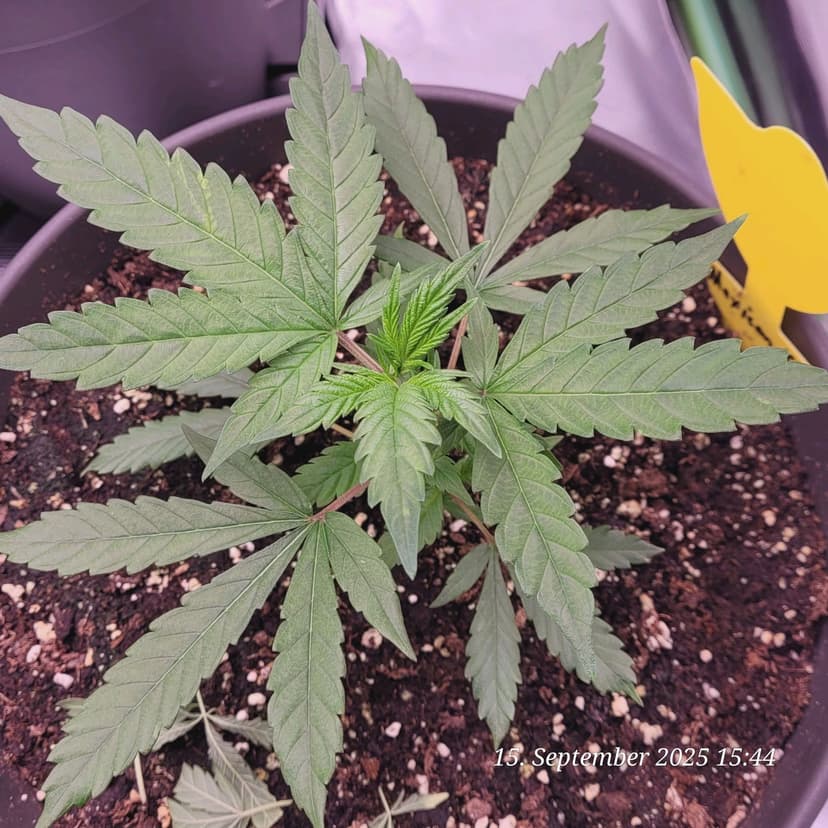
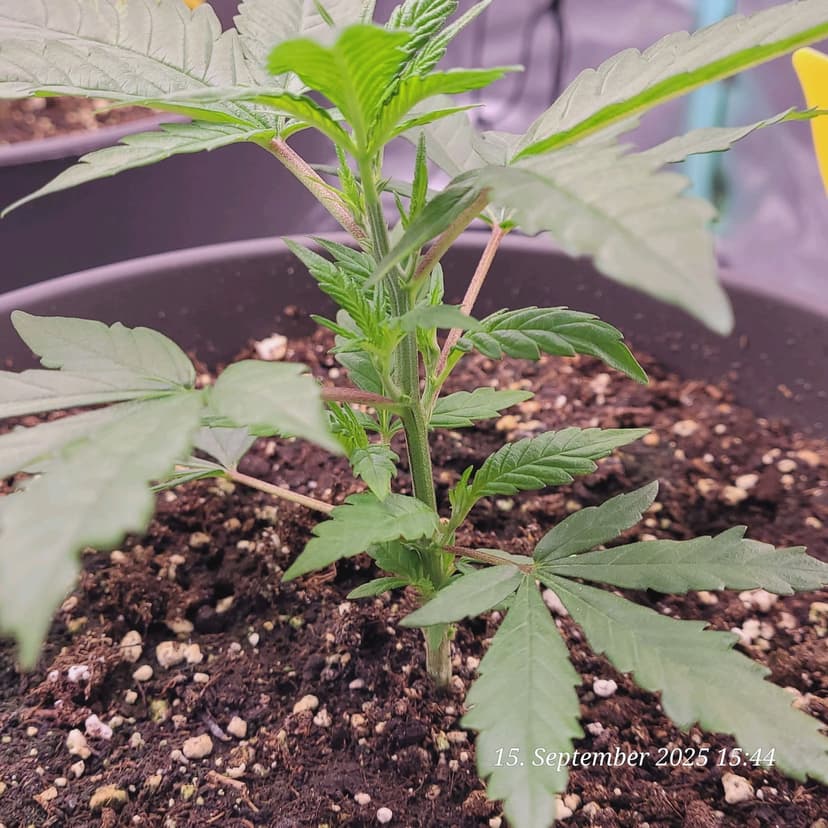
it has grown considerably in height and width and looks damn beautiful, green, and healthy for now. Yesterday it got some water with Wurzel Complex and Power Zyme. To slow it down a bit so that the other two, which still need healing time, can catch up. They are cultivating, but still very slowly.
Today I took it on and removed a bit of the top. I think this is more in the direction of FIM, because I didnāt completely top/remove the tip, but only removed about 75 - 80% of it.

Now letās wait and see what that will bring. At least it will need a few days of recovery now, during which the other 2 could catch up, because it will become calmer for now.
But that wasnāt enough for me, and since everything was fresh, soft, and pliable, I bent the slender stem by 90 degrees and then secured it.
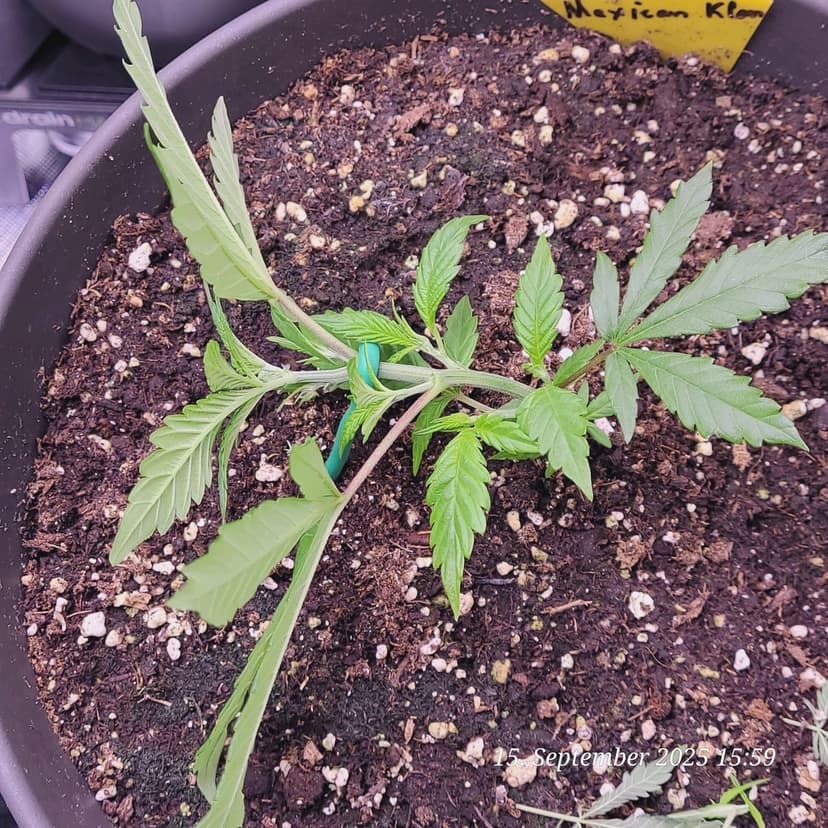
So it lies practically horizontally, just above the soil, and I cut away larger fan leaves that were resting on the soil because of this. There were already 5 or 6 nodes with lateral shoots that can now expose themselves nicely to the light.
It remains to be seen how things will continue with it.
The Jamaican clone has only grown minimally, but hereās the problem;
today only 18 days young, only 6 days in soil, taken from the 2nd week of flowering, it had to root and reveg, which the latter is not yet complete.


but itās looking healthier every day and has regained a beautiful green color.
As for the Fast Diesel clone, the stunted structure is slowly cultivating out here too and itās starting to look normal. I assume that I put it in soil too early during rooting. It has been in there for 12 days now.
Well - good things come to those who wait, or something like that.


Here Iām currently considering, because it still looks a bit strange from the top and is cultivating normally from the bottom. To amputate its top as well.
???
I have also immortalized sightings in my Growlog, from my flowering temple from flowering day 29 today, which I will then present immediately or tomorrow at āshow your ladiesā.
Stay High, Pflanzenpaule wishes you a good evening ![]()
Thanks for the explanation
Then I assumed correctly. ![]()
![]()
![]()
A little thought.
If you now, as @herr_gruen did in his post, also drill holes all around the plastic pot, would you then have to line the pot with fleece again from the inside or outside? That would also be an entry point for the critters
Iāll stick with the fabric bag ![]()
![]()