Stecklinge in der Blütenphase šŸ§‘ā€šŸ”¬

48 respostas · 520 visualizações

Dbe

#10

Just remembered something. :index_pointing_up:
I just have to quickly mention this.

The difference between the various rooting techniques. With water, it slowly perishes if you don’t pot it in time. You can see just before root formation that the leaves are limp and losing volume.
With the method of letting it root directly in soil, it simply starts to grow. And only a few leaves die off in the process. But for comparison, I’ll also root the next one in soil again and share it here. Then you can see the difference best.

Anyway…

Until next time

Grow on :smiling_face_with_sunglasses::victory_hand::love_you_gesture::+1::ok_hand::cloud::cloud::cloud:

Responder ↗
snAke

#11

Place them in willow water for 24 hours, then into the soil and water with willow water. Last year I had 5 or 6 clones standing in willow water, then my wife went to the hospital. I didn’t take care of them anymore, just refilled the water; priorities were elsewhere. When she was back home, she planted the clones that had already formed thick roots and placed them by the window in the stairwell. They actually grew quite well, considering the

Responder ↗
Dbe

#12

Hi @snAke

I’ve heard that willow water is always good. I’ve never tried it myself. So far, except for one batch that ā€œfell overā€ with a hangover :cat:, I’ve always managed it the classic way. Of course, the question now is whether it’s faster with willow water for rooting.
I don’t question its effectiveness! :index_pointing_up:
To be honest, I’m a bit too spoiled by my success in making cuttings. I’ve never had to help them along before. :person_shrugging:t2:
And should it ever not work as well as it used to, then that’s at the top of my list. :memo:

Grow on :smiling_face_with_sunglasses::victory_hand::love_you_gesture::+1::ok_hand::cloud::cloud::cloud:

Responder ↗
snAke

#13

Others buy root stimulants from the fertilizer mafia, I make my own stimulants for free. What else occurred to me is that if you leave the tuber from the noid standing, roots form best there. Potplanter tested it and I approved it.

Responder ↗
Dbe

#14

Some time has passed again and I’ve got new pictures of Zami :seedling: with me. But in this episode, I’ll just explain how I root classic cuttings in soil… :leaf_fluttering_in_wind:

… For this, I’ve taken simple cuttings from the growth phase of my ā€œStrawberry Coughā€
:strawberry::heart_eyes:

I made the selection of cuttings easy for myself in this case. Since I top 90% of all plants anyway. :scissors:
I had voilà…

IMG_20250819_115350_edit_647065083860119

I took the upper shoots. (Of course, I also processed the rest into cuttings :wink: )

Then the lower leaves were completely removed… :leaf_fluttering_in_wind:

IMG_20250819_115426_edit_647085507150741

Nicely sharpened diagonally / at an angle. The larger the angle, the better. For me, it’s always well over 45°… :kitchen_knife:

IMG_20250819_115618_edit_647124169324694

Then quickly make 2 to 3 longitudinal slits… :razor:

IMG_20250819_115711_edit_647171342132499

I hope it’s recognizable. :eyes:

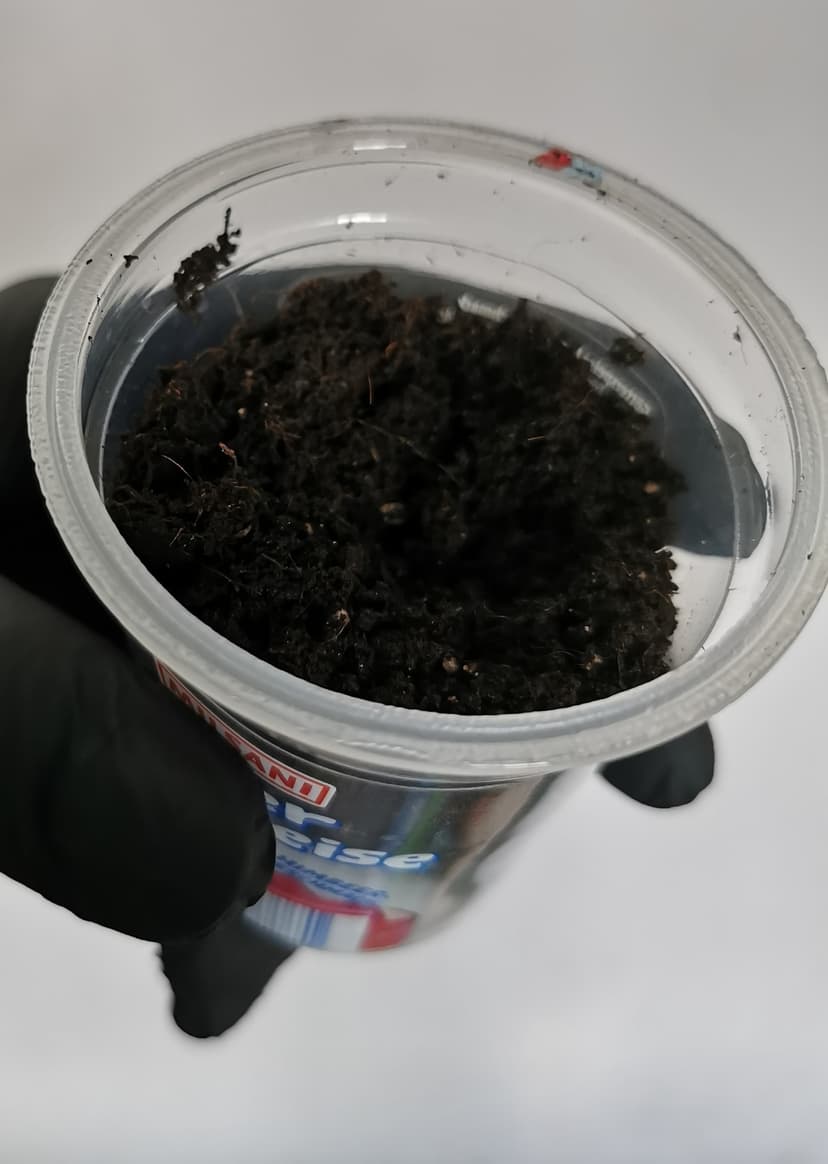
The whole thing now goes into ā€œHerb and Seedling Soilā€ā€¦

IMG_20250819_115842_edit_647190012505413

Make a hole that goes down to the bottom of the cup…:cup_with_straw:

IMG_20250819_120135_edit_647207638135618

The pictures are unfortunately in the wrong order now. But never mind. The only important thing is. That you only very lightly compact the soil on the surface.:index_pointing_up: And the rest underneath remains as loose as possible. Spray a little water so that only the top layer of soil gets moist. (This will seep through the soil over time)

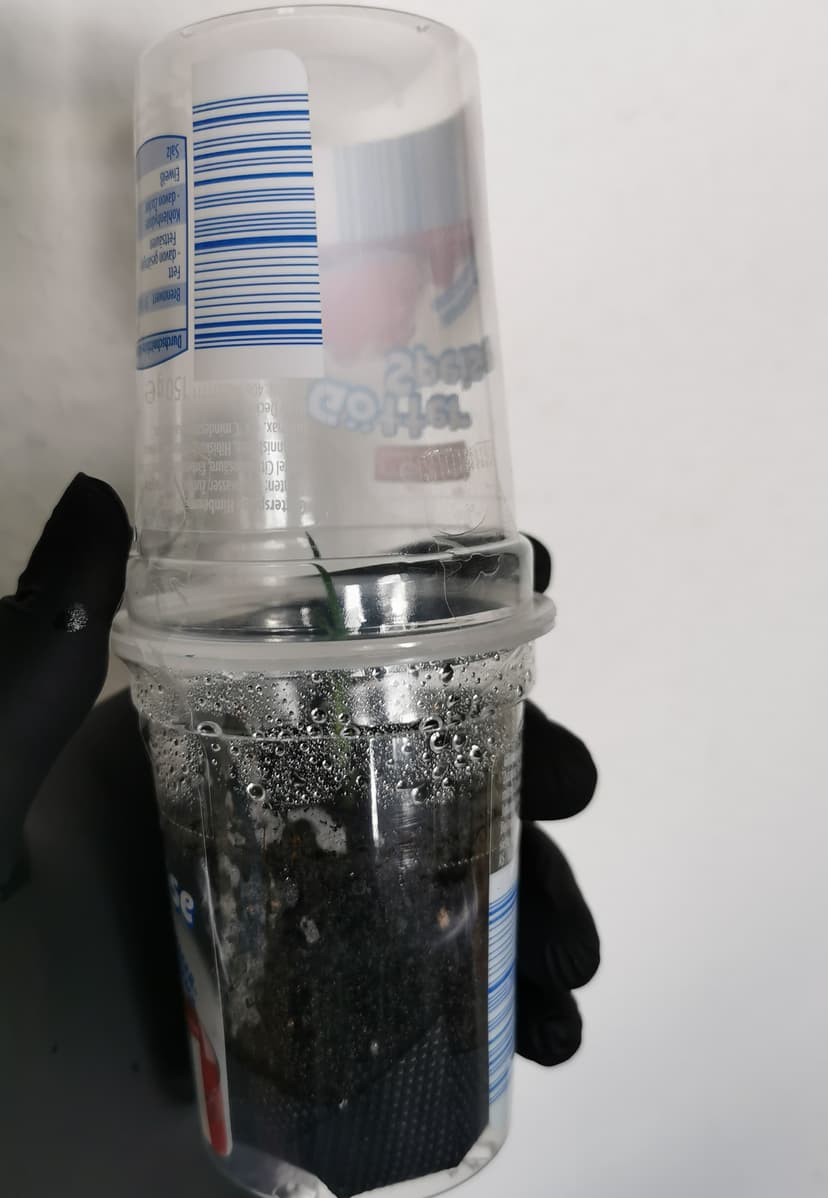
Now put the lightly perforated cup on top and secure/fasten the whole thing with adhesive tape, masking tape, or similar… :knot:

IMG_20250819_120743_edit_647302574750708
IMG_20250819_120733_edit_647272456649671

The whole thing then goes onto the windowsill (preferably south-facing) and will not be touched further until root formation is visible. (Except to check if roots are already there. That’s why it’s secured.)

This is how I’ve been doing it since I started growing cuttings.
It has always worked for me this way. Sometimes faster, sometimes slower. But always with success!

I hope it works as well for you when you try it. :folded_hands:

In this spirit, your Dr. Weedenstein

Grow on everyone :smiling_face_with_sunglasses::+1::sign_of_the_horns::victory_hand::ok_hand::cloud::cloud::cloud:

Responder ↗
snAke

#15

I used to do it that way before, cut diagonally. But after I saw a video comparing two cuttings, one cut diagonally and one directly below the node, leaving the node’s bump intact, and the one with the node rooted much better, I now leave the node intact. And lo and behold, the 5 cuttings with the node as the lower end rooted well; one where it didn’t work at the node because it was too small, didn’t root.

Responder ↗
Dbe

#16

Well, you see, my @snAke, :smiling_face_with_sunglasses::victory_hand:

It works better for you that way. That’s super cool! I’ll definitely remember that! And I’ll try it right away with the next batch! :index_pointing_up::+1:

I’m curious anyway how long it will take this time. And which of my ā€œACā€ will become something. :wink::smiling_face_with_sunglasses:

Wonderful, that’s how I imagined it here! :+1:
Advice is always welcome! :victory_hand::victory_hand:

Grow on :smiling_face_with_sunglasses::+1::sign_of_the_horns::victory_hand::ok_hand::cloud::cloud::cloud:

Responder ↗
snAke

#17

My last cutting, which I couldn’t cut below the node because it was too short, has now rooted. I need to slowly assemble my propagation box (a wire shelf, emergency blanket around cardboard, 2x 20w grow lights) so I can get a bit more space and light. I’ll use 5-liter pots and let them veg in there until the tent is free again (approx. 33 days). Depending on how big they are then, another one or two weeks of veg and then into flower. A quick run with 3 Blue Zushi and 3 Jealousy clones.

Responder ↗
Pflanzenpaul

#18

Hello everyone, and Paule is also running a cutting project with a small interim report.

20250824_160828

Water temperature 24.9 degrees Celsius, also quite constant due to a 25 Watt aquarium heater lying in 5 liters of water.

20250824_160735

20250824_160729

The grow chamber has been in operation since 08/19/25, fully air-conditioned.

Up top, the young plants are standing strong. No sickly appearance!

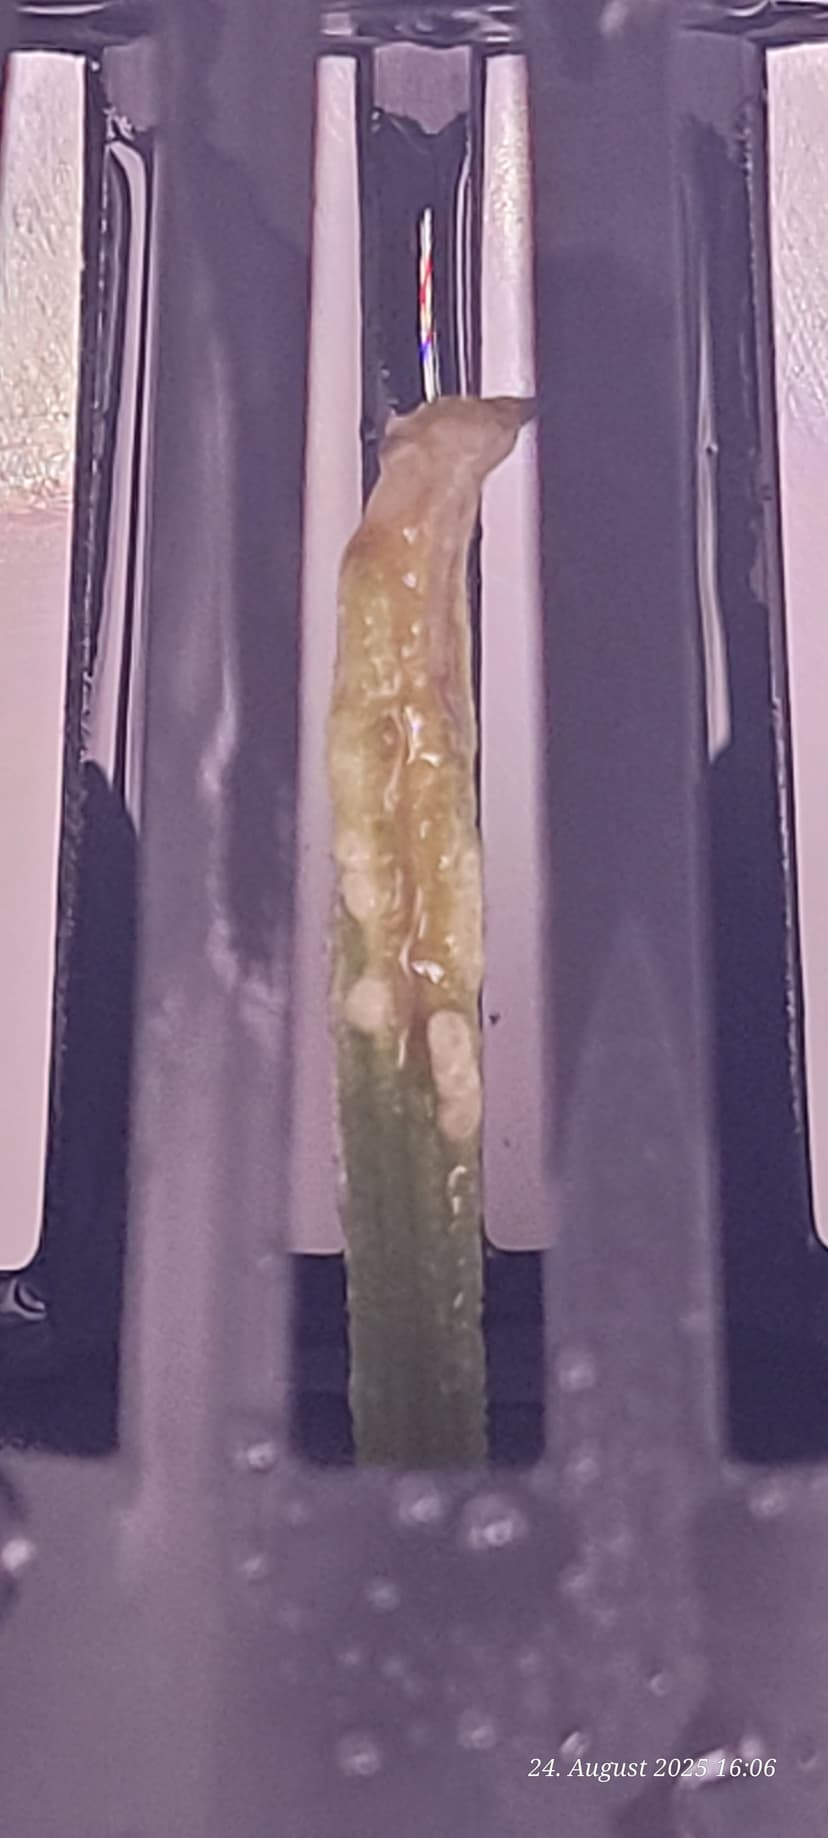
Right from the start, roots were visible in 3 days, which seemed a bit exaggerated to me at first.

On day 5 today, something in the direction of rooting can already be discerned on both the right and left.

The ones on the right were already in water for 6 days before they were placed there. The ones on the left for 3 days. But now they’ve been in there for 5 days, and both the right and left are developed to about the same extent.

Now a look into the dark, under the floor where the stems are constantly sprayed with well-tempered water and root stimulants.

20250824_160657

20250824_160426

Something’s happening, and that’s why the ventilation was opened a bit today to slightly lower the humidity inside. I’m curious to see what happens next time when the cuttings are put directly in there, without being left in water for longer beforehand.

Stay High and have a nice day.

Plant Paule

Responder ↗
Dbe

#19

There he is, @Pflanzenpaul :tada:

I was already waiting for your post here.:potted_plant: You’re topping us all again here with your ā€œfull-pro toolā€. :test_tube::petri_dish::microscope:
That’s a really cool device you have! :+1::+1:
It also looks very promising! :seedling:

If I had the money, I’d get something like that too. Well, luckily it’s been working perfectly for me so far. I’m just going to assume that you’ll keep us updated here. Just like you always do.

Grow on my Friend :smiling_face_with_sunglasses::+1::sign_of_the_horns::victory_hand::ok_hand::cloud::cloud::cloud:

Responder ↗
Dbe

#20

So, and once again ā€œBack to the rootsā€ :smiling_face_with_sunglasses::victory_hand:

This time we continue with ā€œZamiā€. :potted_plant:

IMG_20250824_122908

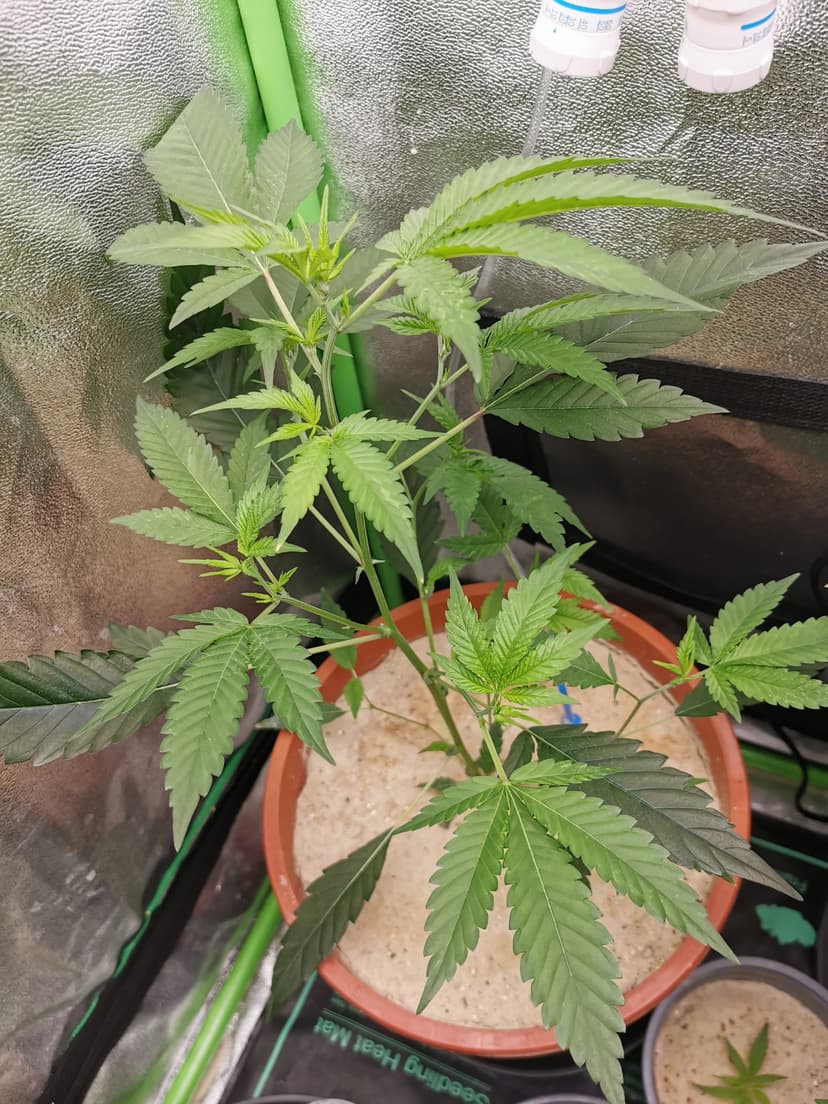
As you can clearly see, after a week in the soil, it’s fully revegging. So far, still in the small 0.5 l pot. :bucket:
Just for comparison…

Screenshot_20250825_003418

That was Zami just a week ago. :wink:

I always find it cool when another cutting makes it. No matter how often I do or have done it. :star_struck::slightly_smiling_face::grin:

If Zami continues like this, I will move her to the final pot at the end of the week.

Since the rest is still all in the rooting phase, I’ll leave it at that for now. :victory_hand::smiling_face_with_sunglasses:

Until then, stay tuned and see you in the next episode.

Your Dr. Weedenstein

Grow on everyone :smiling_face_with_sunglasses::victory_hand::sign_of_the_horns::+1::ok_hand::cloud::cloud::cloud:

Responder ↗
Dbe

#21

Hallo my Growlings :smiling_face_with_sunglasses::victory_hand:,

Some time has passed again. :hourglass_not_done::hourglass_done:

And as I mentioned at the beginning, it always takes some patience…:sleeping_face::sleeping_face:

But it always progresses.

For example, here:

IMG_20250905_202425
IMG_20250905_202413

:heart_eyes::heart_eyes:

Yes, those are 2 of the 3 classic cuttings taken from the Strawberry Cough. :strawberry:

Since the first roots have already reached the outside of the cup. Rooting started days ago. :wink::blush:

…

And what else happened.. :thinking:

Oh, look :eyes:

IMG_20250905_202402

ā€œZamiā€ is still revegging. :+1:
Now it’s in its final pot. :potted_plant:
It still looks very bare. But it’s slowly transitioning into normal growth.
What happens next will be really interesting again. :grin:

If you look at how, for example, the lower part of the cutting from which Zami originated now looks.

IMG_20250831_144347

And even here, there’s still something going on until flowering. I’ve thinned it out twice already. There’s hardly anything left to see. :smiling_face_with_sunglasses:

That’s it from me this time.

Stay curious and see you in the next episode. :wink:

Your Dr.Weedenstein :scientist:

Grow on everyone :smiling_face_with_sunglasses::+1::sign_of_the_horns::victory_hand::ok_hand::cloud::cloud::cloud:

Responder ↗
Pflanzenpaul

#22

Meanwhile, time to report on my clones. The first one has been in soil since 30.8. and is growing again and looks healthier. I need to take an updated picture tomorrow. It’s probably a Mexican clone.

1757189048527

1757189056989

A Fast Diesel clone then followed on 3.9. into soil.

1757189226826

1757189238848

Another one of the strain is still in the propagator and could also be well-rooted in soil. But;

so I took three lower branches from the Jamaican, but already during flowering time on 29.8. in the 2nd week of flowering.

They were only shortened and then placed directly into the propagator. No angled cut, no Clonex. Only Root Complex from Hesi. The day before yesterday, a last look inside the water bath already showed small first roots.

That’s why I’m keeping one pot free.

Good evening everyone. Paule

Responder ↗
Pflanzenpaul

#23

Hello everyone, and here are a few quick cutting pictures from this beautiful Sunday morning. The one that went into soil on August 30th

1757236958372

1757236968397

shows recovery and growth!

The Fast Diesel clone, in soil since September 3rd

Shows the point of no return on the lower leaves :innocent:, while recovery is starting at the tip.

1757237098312

1757237086272

It was already yellow in the young shoot at the top. :rofl:

I know, the thread is called ā€˜Cuttings in Flowering Time’ and things are also going well there!

Even better than the ones shown here, because they had already been in water for 3 and 6 days after being cut before they even went into the propagator.

So they took about 18 days until they were in soil.

As for the Jamaican cuttings taken on August 29th and put directly into the propagator, this is how they look today;

20250907_111702

20250907_111535

20250907_111630

All three have already rooted! But I’m letting the roots get a bit bigger before they go into soil to keep transplant shock minimal.

If you zoom in on the Jamaican cutting pictures, you should still be able to see bud sites at the tip. Happy Sunday from Pflanzenpaule

Responder ↗
Pflanzenpaul

#24

Today, a thorough watering was also on the agenda for the clones, and I wanted to do it particularly well, so I took 1L of water. 1/3 distilled and 2/3 tap water. Now the clones are in 9L pots with Light Mix! So, there’s enough nutrition for a good 3 weeks. The water mixture showed an EC of 0.4. A bit weak for under LED, so I added 0.2g Epsom salt and 0.6g Calcium Sulfate Dihydrate, which brought the EC to 0.7. With another half liter of water, the EC of 0.6 was safe. The pH was still around 8, which I lowered to 6.3 with a few drops of lemon juice after the Hesi Root Complex (2.6ml) and Power Zyme (1ml) were added. Finally, before the final watering, I added 10ml of Molasses/Whey, and as a precaution against any soil-dwelling pests, I stirred 1g of Neem oil with an emulsifier into the water. With this, the rooting phase for 2 clones ended today, and they are now in growth. I’m already looking forward to planting another Jamaican clone soon, as there’s still a pot ready. Stay High, friends, and multiply your plants. :joy: Pflanzenpaule

Responder ↗
Dbe

#25

Es wird mal wieder Zeit… :smiling_face_with_sunglasses::victory_hand:

… To let the ā€˜smokable’ shine on. And to tell you something from my ā€œgarden.ā€ :grin::grin:
Black tent with green plants!
Done! :joy:

Nah, nah.. :smiling_face_with_sunglasses::victory_hand:

What are we looking at today?

Zami has arrived in the grow phase. Today she was topped. Here’s another picture before the scissors. :scissors:

IMG_20250914_124047

Still looks very bare? :eyes::thinking:
Yep, still very thin for this phase. My guess is the long rooting time. It seems like she lost some power there. But her journey is only just beginning. We’ll see. :eye_in_speech_bubble:

Zami’s ā€œlower endā€ā€¦

IMG_20250914_124017

Already has the first pistils. :hugs:
And is stretching along. :potted_plant::rosette:

And just as a side note… All my clones set from the :strawberry: Strawberry have rooted. So, 100% again.

IMG_20250914_124113
IMG_20250914_124111
IMG_20250914_124110

The funny thing is that you can see which one rooted first. And which one rooted last. :grin::smiling_face_with_sunglasses:

Until next time from me here.

Your Dr. Weedenstein :scientist:

Grow on everyone :smiling_face_with_sunglasses::+1::sign_of_the_horns::victory_hand::ok_hand::cloud::cloud::cloud:

Responder ↗
Dbe

#27

Hi @KilliczGe :smiling_face_with_sunglasses::victory_hand:,

Yes, exactly bird sand.

Let me put it this way…

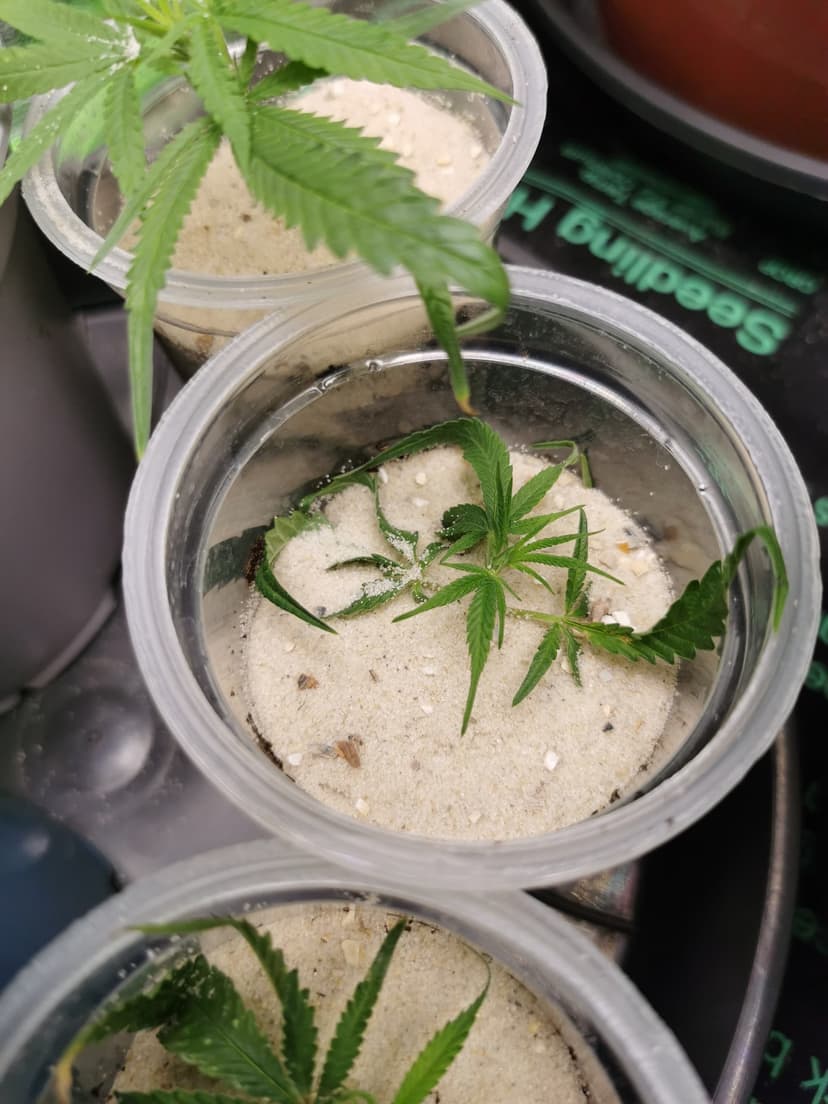
2 cm bird sand on top + a double layer of weed fabric at the bottom = no more problems with fungus gnats! :wink::smiling_face_with_sunglasses::victory_hand:

For me personally, the most effective way. I’ve been doing it like this since I don’t know when. And it works. :+1:
Every pot of mine looks like this. I only omit the sand for rooting.

Grow on :smiling_face_with_sunglasses::+1::sign_of_the_horns::victory_hand::ok_hand::cloud::cloud::cloud:

Responder ↗
KilliczGe

#28

ā€œAt the bottomā€ at the bottom of the pot? Or under the sand?
Is it also necessary at the bottom for fabric pots?

Yes, I’ve also experimented around. Lava mulch works with small grit but is expensive in the long run.
Pumice sand stays moist for too long and pumice stone is too light.

Then the budgies will probably have to give up some sand. :joy::nerd_face:

Responder ↗
Lena_Bpunkt

#29

This topic is awesome and it even works. I also tested it after reading about it here :joy::ok_hand:

Took a cutting in bloom, put it in a glass and cut it directly at the leaf node, after three days the first roots were visible :scream: A big cheer to your experiments :folded_hands:t4:

Responder ↗

Responder